
Post by Mowser on Apr 24, 2007 1:17:24 GMT -5
As you may have seen last week I was looking for a early wiper assembly for my ‘67. Well I got a set (HUGE THANKS TO CHRIS aka Commercial Air) and proceeded to install them on my bus. For those that don't know the '67 came equipped with a 2 speed 12V motor. It also has a completely different assembly.
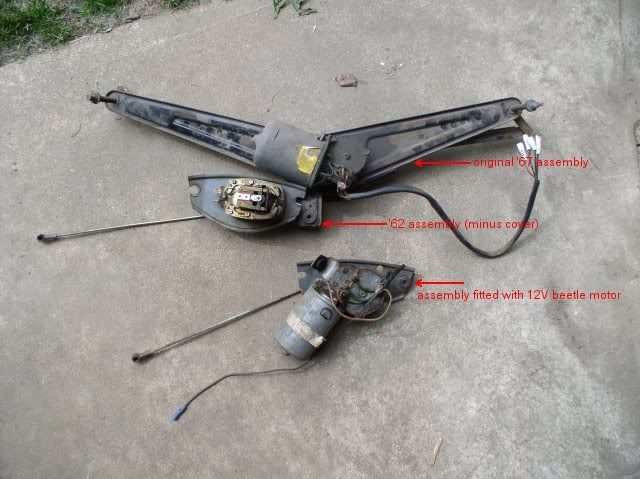
On a purely cosmetic aspect I wanted to go with the earlier (6 volt assembly) as the safari pivots available for those years are spring loaded and hidden under the dash. Achieving this appeared very simple at first but turned out not to be a bit bigger of a job.
Here’s my play by play of how I achieved it. First off, as with any work done under the dash of your bus remove the positive terminal from your battery. There are too many places you can cause a short with the power on. Next I simply removed the '67 assembly complete with switch. I then installed the early set in it's place to get an idea of what needed to happen. I then fabricated a pair of brackets for the replacement motor.
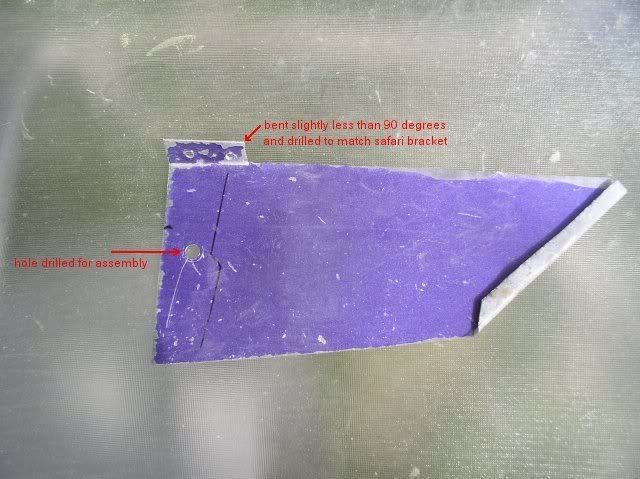
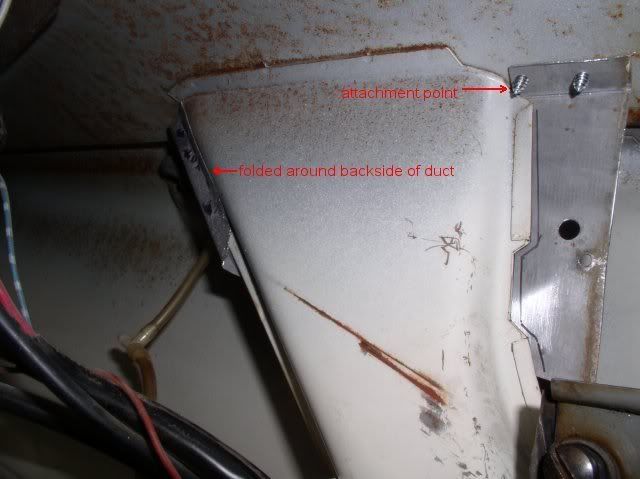
As I don’t own a welder I opted to using the mounting brackets for my safari latches. I then cut down sheet metal to fit and wrap around the back side of the front ducts. Pre-bending and drilling the holes was the only real trick but relatively simple.
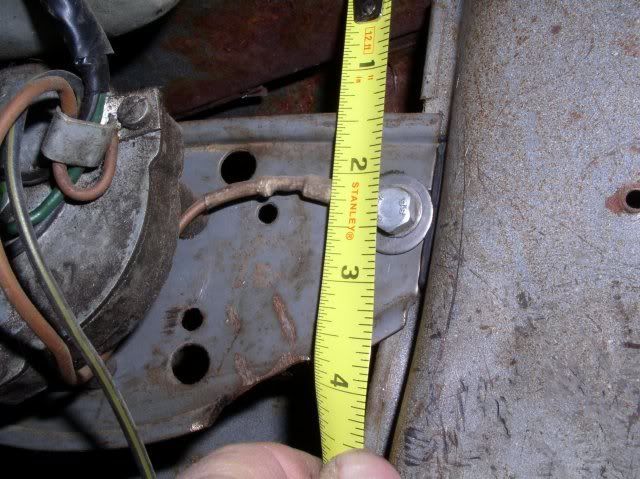
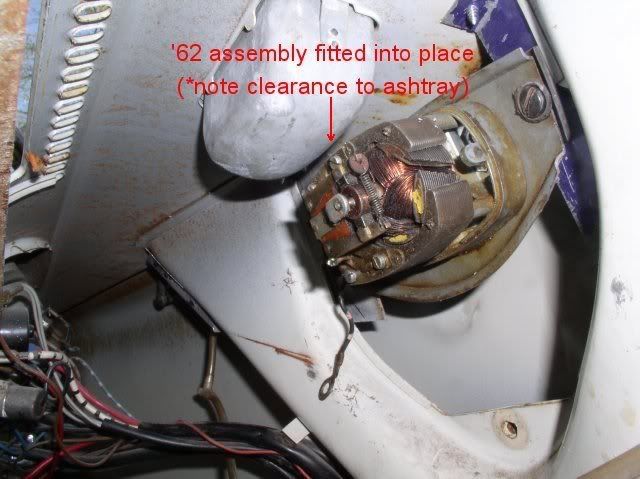
Once the brackets were installed to my liking I lifted the motor up into place and marked the holes I would need to mount the motor. The first picture shows a factory install, the second with the measurements I decided to use. (I need to have the motor as far up as possible to be discussed later)).
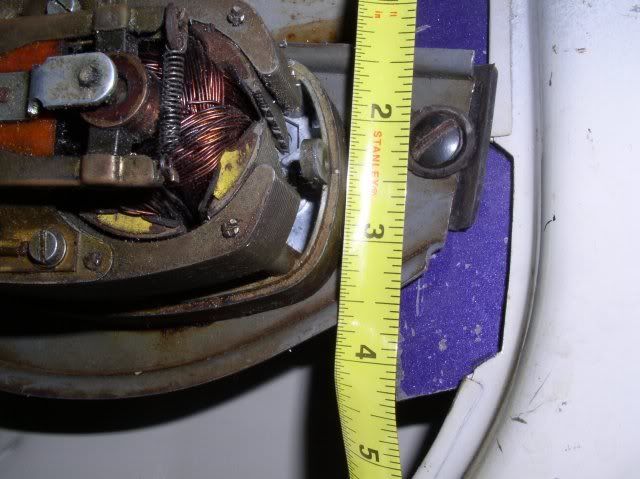
You MUST have the ashtray in before you mark the holes for the motor. I almost didn't and would have had to start over if I hadn't thought of it. The 6V motor JUST clears the bottom of the ashtray once installed.
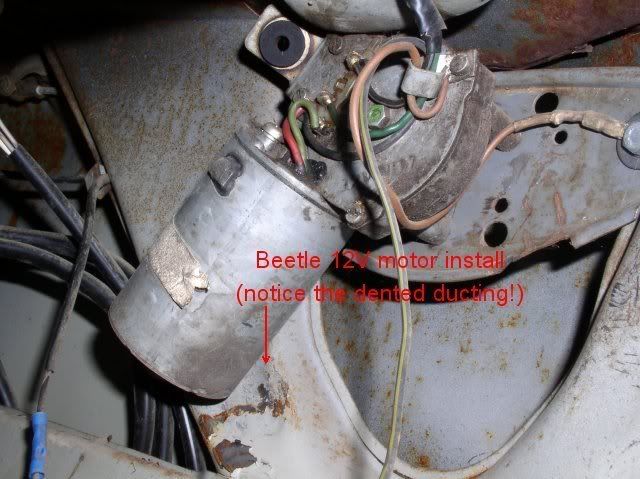
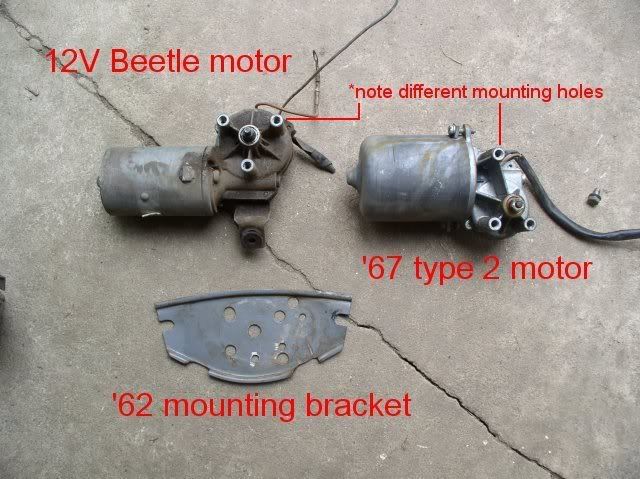
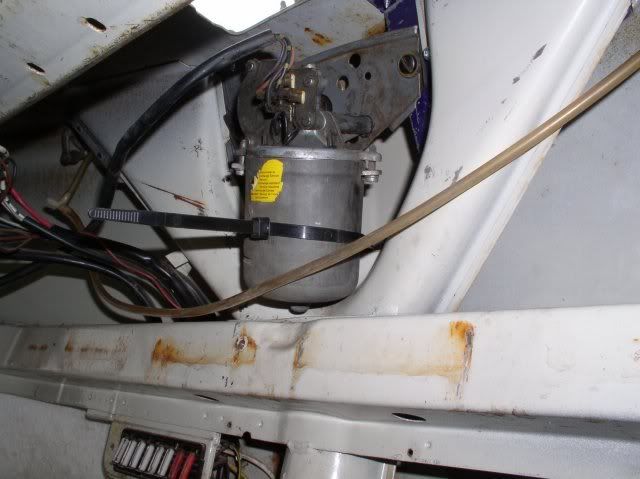
This would be the end if you were to put in a voltage drop resistor. Of course then the fun would be over. I still wanted to use my 2 speed, 12 Volt motor so on I go to the next step. Now I have to fit my existing motor onto the 6 volt motor bracket so it clears the dash heater ducts. Not that easy to do. I looked at a different approach using a beetle 12 volt motor but opted out. I simply don’t like the idea of bashing in the heat ducts to make the motor fit.
My approach is if it can’t be unbolted and replaced then look for another route. Several trials later and re-drilling the bracket and I had a working set-up.
Looks real good right but unfortunately I now have clearance issues with my ash tray. Well since that’s a removable piece (and kinda crusty from years of use) I simply took out the trusty hammer and punch.
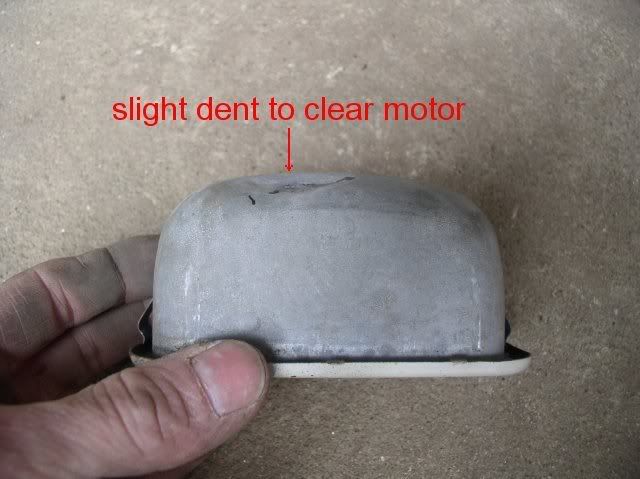
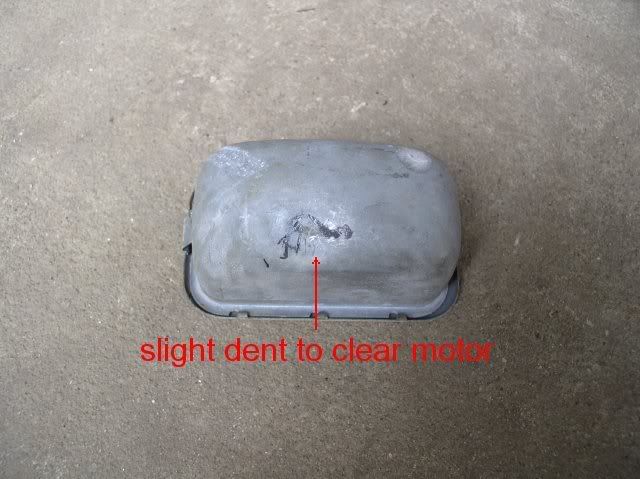
It fits now and really it’s not even noticeable.
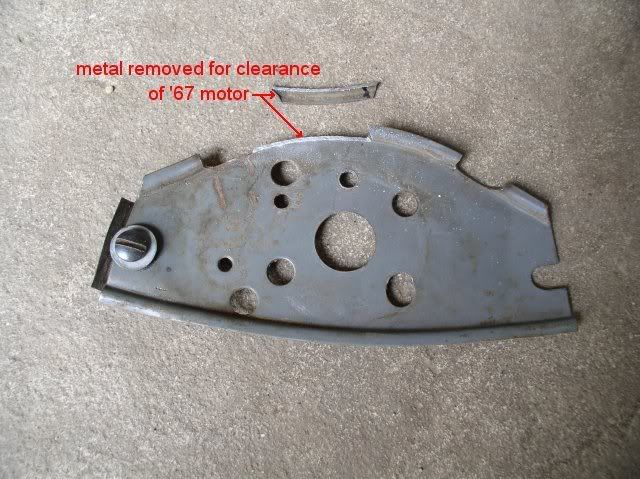
Awesome it’s looking good and now to install the parcel tray. Hmmm, next hurdle, but one I was expecting. Once again this is a removable part and I have a spare. Out comes the Dremel (really the only tool for the job) and now everything fits and is looking bang on.
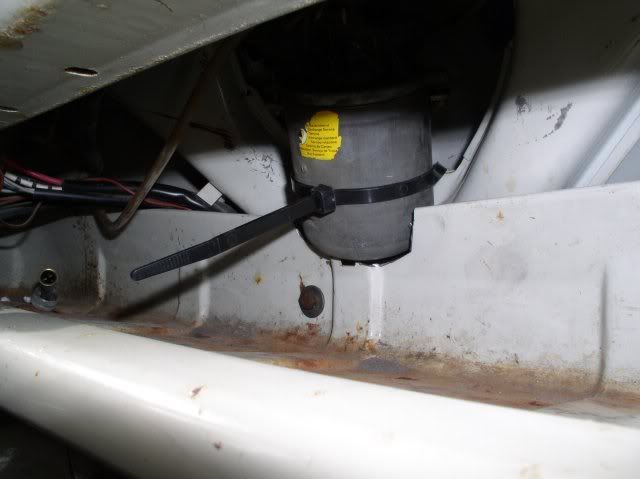
The only thing not mentioned thus far is the use of the long tie wrap you can see wrapped around the motor. I installed a short bolt in from the backside of the original wiper motor hole and used it as a strap point so I could get some extra support on the motor. Don’t think I need it as the motor is solid thanks to the original install and the added sheet metal screws but without it the ashtray would have had to be dented in a lot more. If I have sound transfer from it I’ll end up putting rubber in between the motor and where it contacts the ducting. Won’t know that till I install a switch and turn it on
On a purely cosmetic aspect I wanted to go with the earlier (6 volt assembly) as the safari pivots available for those years are spring loaded and hidden under the dash. Achieving this appeared very simple at first but turned out not to be a bit bigger of a job.
Here’s my play by play of how I achieved it. First off, as with any work done under the dash of your bus remove the positive terminal from your battery. There are too many places you can cause a short with the power on. Next I simply removed the '67 assembly complete with switch. I then installed the early set in it's place to get an idea of what needed to happen. I then fabricated a pair of brackets for the replacement motor.
As I don’t own a welder I opted to using the mounting brackets for my safari latches. I then cut down sheet metal to fit and wrap around the back side of the front ducts. Pre-bending and drilling the holes was the only real trick but relatively simple.
Once the brackets were installed to my liking I lifted the motor up into place and marked the holes I would need to mount the motor. The first picture shows a factory install, the second with the measurements I decided to use. (I need to have the motor as far up as possible to be discussed later)).
You MUST have the ashtray in before you mark the holes for the motor. I almost didn't and would have had to start over if I hadn't thought of it. The 6V motor JUST clears the bottom of the ashtray once installed.
This would be the end if you were to put in a voltage drop resistor. Of course then the fun would be over. I still wanted to use my 2 speed, 12 Volt motor so on I go to the next step. Now I have to fit my existing motor onto the 6 volt motor bracket so it clears the dash heater ducts. Not that easy to do. I looked at a different approach using a beetle 12 volt motor but opted out. I simply don’t like the idea of bashing in the heat ducts to make the motor fit.
My approach is if it can’t be unbolted and replaced then look for another route. Several trials later and re-drilling the bracket and I had a working set-up.
Looks real good right but unfortunately I now have clearance issues with my ash tray. Well since that’s a removable piece (and kinda crusty from years of use) I simply took out the trusty hammer and punch.
It fits now and really it’s not even noticeable.
Awesome it’s looking good and now to install the parcel tray. Hmmm, next hurdle, but one I was expecting. Once again this is a removable part and I have a spare. Out comes the Dremel (really the only tool for the job) and now everything fits and is looking bang on.
The only thing not mentioned thus far is the use of the long tie wrap you can see wrapped around the motor. I installed a short bolt in from the backside of the original wiper motor hole and used it as a strap point so I could get some extra support on the motor. Don’t think I need it as the motor is solid thanks to the original install and the added sheet metal screws but without it the ashtray would have had to be dented in a lot more. If I have sound transfer from it I’ll end up putting rubber in between the motor and where it contacts the ducting. Won’t know that till I install a switch and turn it on
